Here are some instructions on how to use any Goodnotes notebooks you get here on Spec on a Speck. Of course, the instructions may need a little altering depending on the notebook, how many tabs it has, and the templates used. But the instructions should still apply for the most part.
UPDATE: this process will also work with all of my digital planners! If you have Goodnotes 6, some of the icons may be located in a different place, but the same principles apply!
Please reach out if you have any questions!
How To Use Your Digital Goodnotes Notebook
Follow the below steps for importing your notebook into Goodntoes and building your notebook in a way that’s perfect for you!
1. Import the PDF or Goodnotes file to Goodnotes
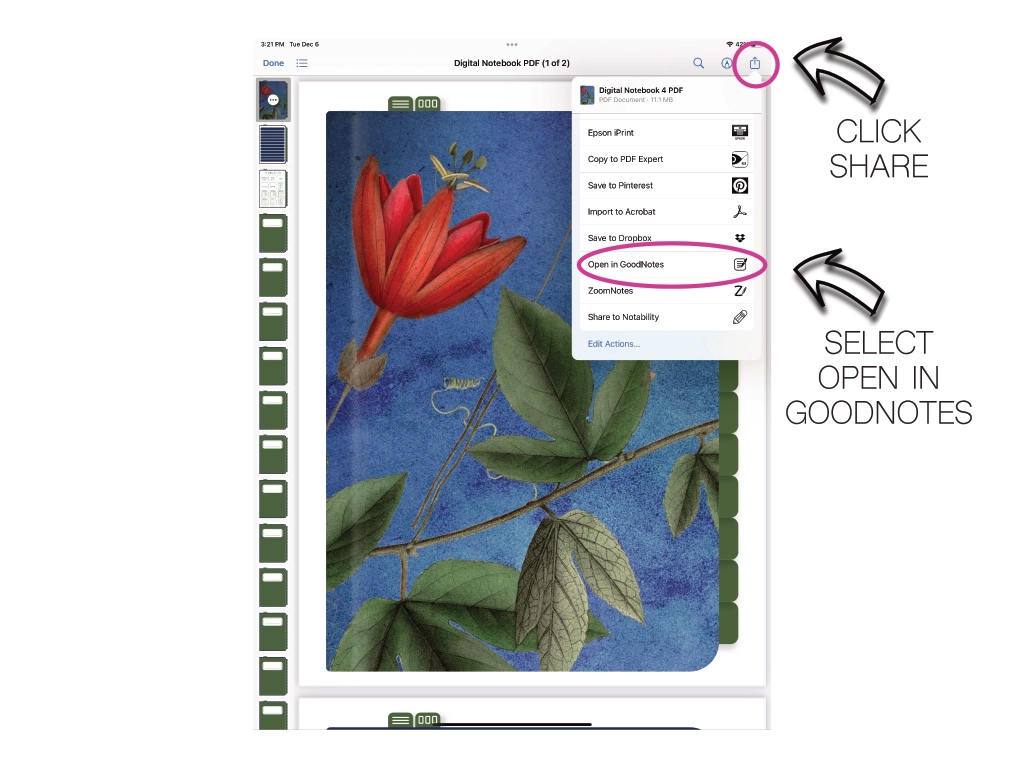
If you click on the Goodnotes file, it should open automatically. If you choose to use the PDF file, click share, then scroll down and select “open in Goodnotes”.
2. Select "Import New Document"
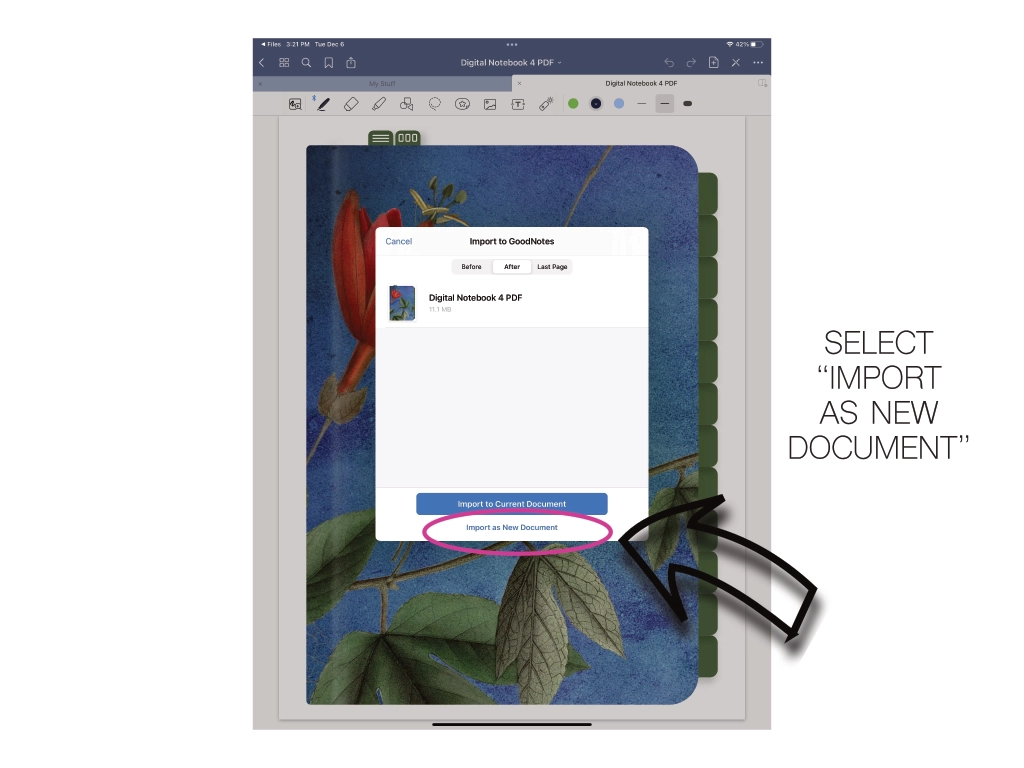
You want to be sure to select “import as new document” otherwise the notebook will import into the middle of whatever file you have open.
3. Fill Out Your Index
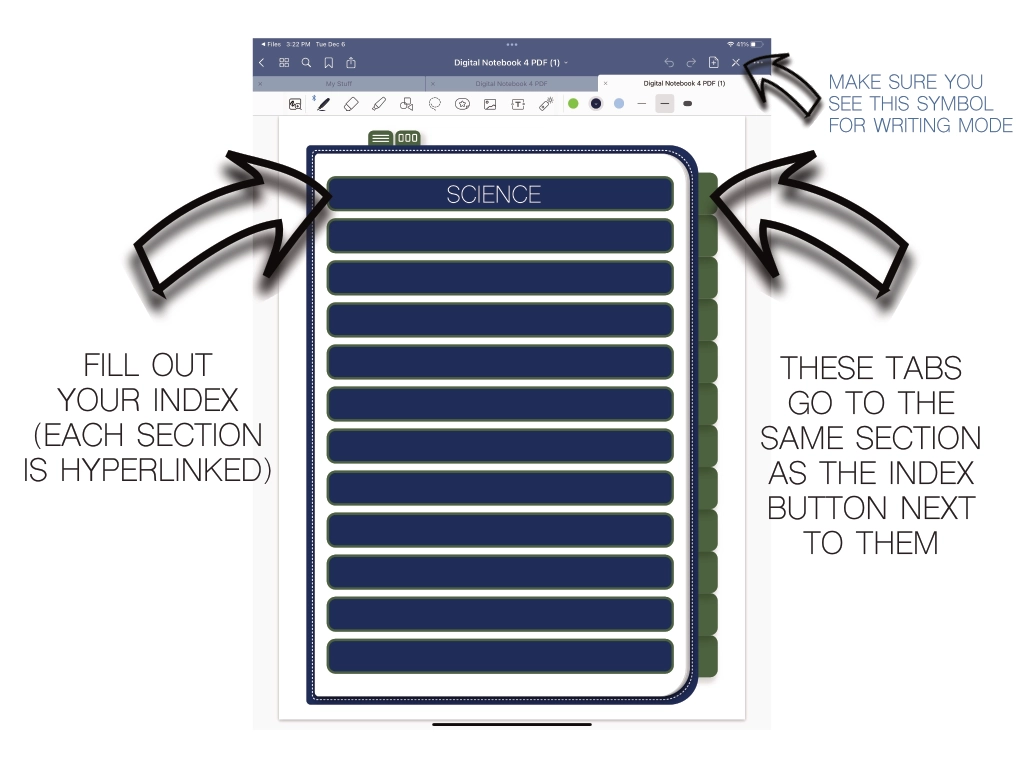
Once you have your notebook imported into the Goodnotes app, you can start filling out your index!
Make sure you see the symbol as shown below (writing mode) other wise you won’t be able to write. Then click the symbol again when you are ready to click on your hyperlinks.
Note- The index buttons and the the tabs next to them go to the same cover page.
4.Fill Our Corresponding Cover Pages
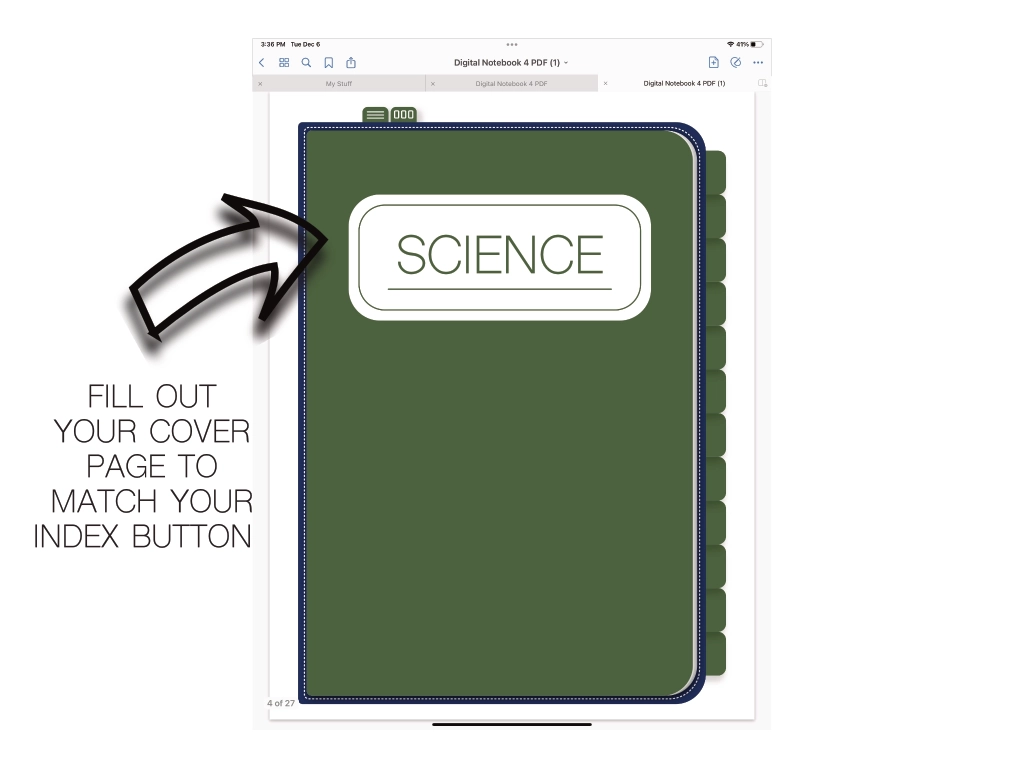
Now it’s time to fill out your cover pages! Generally you will write the same thing you wrote on your index buttons to keep everything organized! Now. once you click on “science” in your index (or the tab next to it” you’ll end up on the matching cover page!
It’s time to start building your notebook the way you want it! First, click on the templates tab (top of the notebook with three small rectangles). Then, click on the template you want.
Remember, you need to the see the symbol below to be out of writing mode to be able to click on hyperlinks.
5. Pick Your Digital Templates
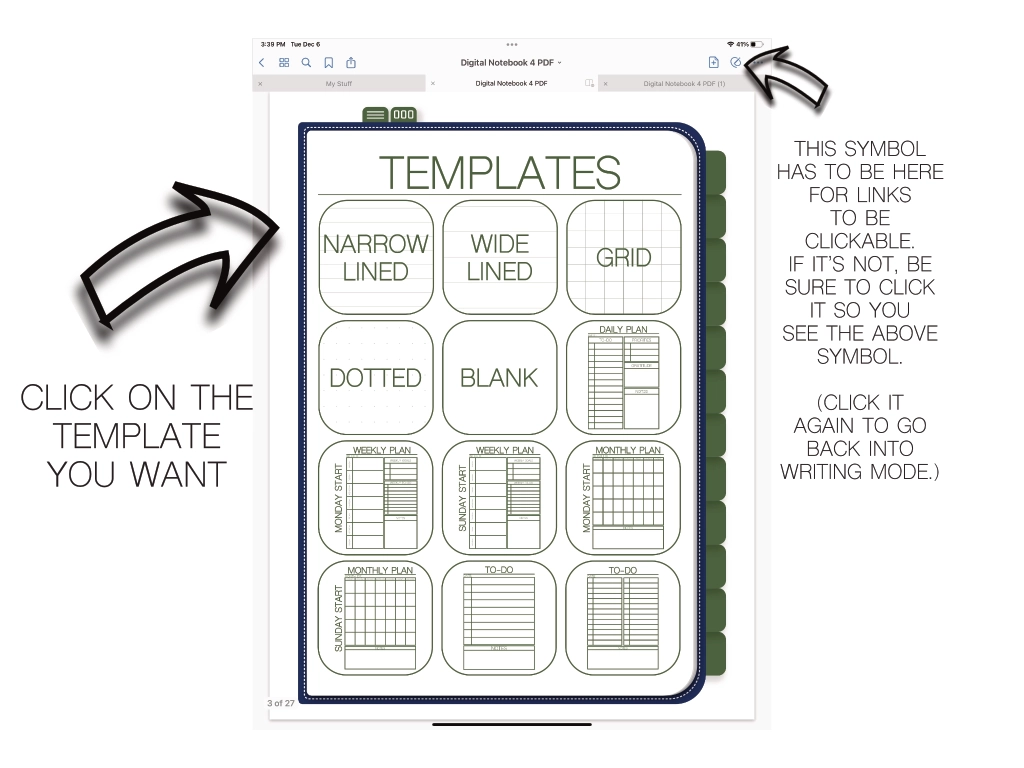
6. Copy the Template You Want to Use
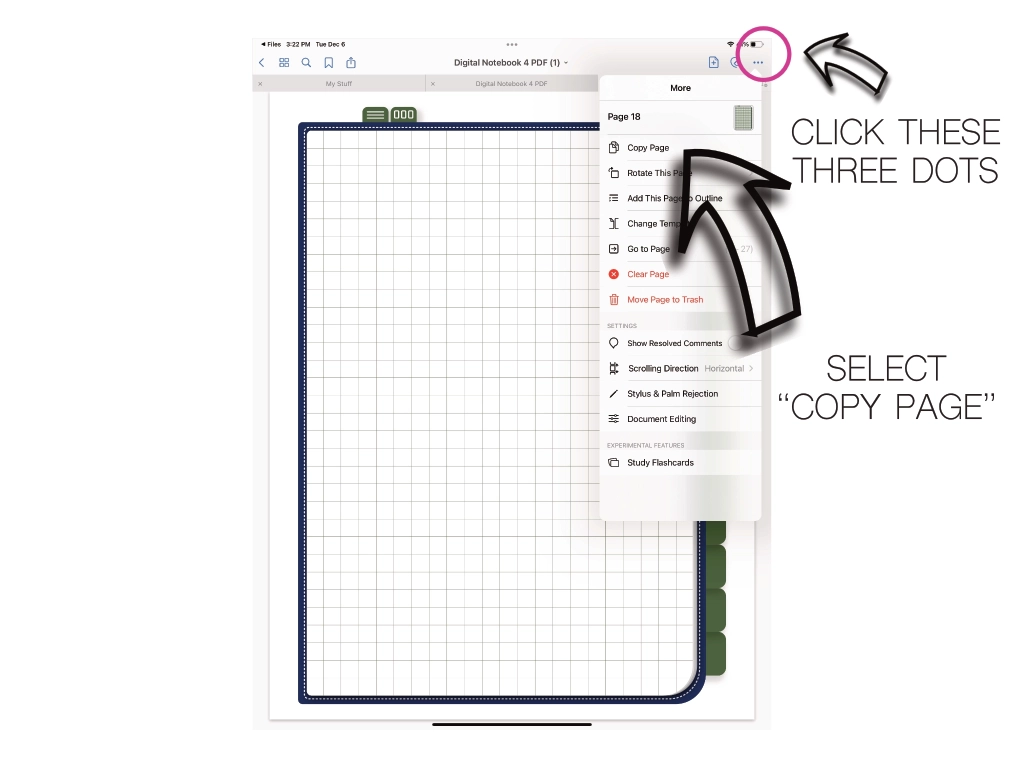
Once you are on the template you want to use you’re going to make a copy of it by going to the three dots in the top right corner. Then, “select copy page”.
7. Insert Template Where You Want It
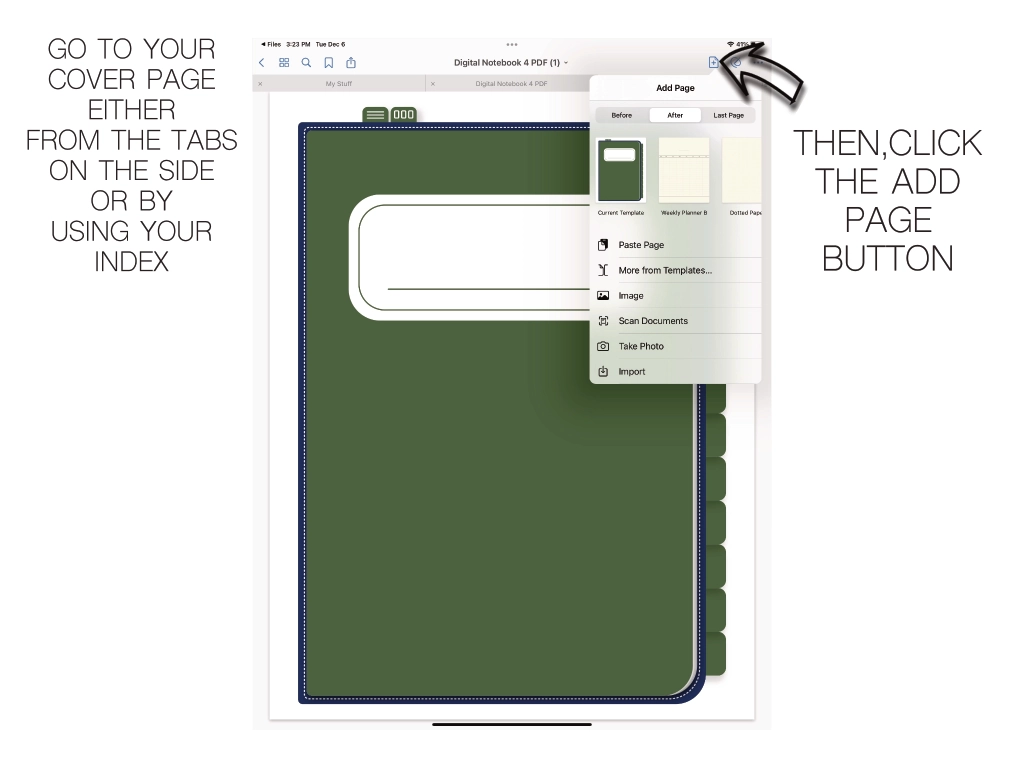
Once you have copied the template you want, go to the section you want to place your template. Click the add page button, then select “paste page”.
Your template will past in AFTER the page you are on, so keep that in mind when placing templates where you want them.
7. Repeat as Needed!
Repeat this step as many times as you need! If you know you are going to be using 10 grid pages in a row, you can just copy the one you are on and paste that one, you don’t have to jump all the way to the original template.
NOTE- I recommend keeping a clean copy of the templates and not writing on any of the originals. Wait to write until you have pasted your copy where you want it.
Free Digital Notebooks
If you would like some free digital notebooks to try this out on be sure to check out all the free ones I have to offer!
2022 Free Goodnotes Notebooks
Follow the link below to see the 2022 free Goodnotes notebooks collection.
2023 Free Goodnotes Notebooks
Our 2023 Goodnotes notebooks will be listed monthly with other Goodnotes freebies. So be sure to follow along and check back often.
Free Digital Planners
Be sure to check out all of my free digital planners as well!
Goodnotes BIG Bundle - Lifetime Access
If you like our $1 Goodnotes, take a peek at our Goodnotes BIG bundle with lifetime access to future updates! This bundle includes all of my current and future $1 Goodnotes notebooks!


1 thought on “How to Use Your Goodnotes Notebook”